Last week at Articulate’s E-Learning Heroes, David Anderson presented us with an interesting challenge to create a drag and drop activity that was not quiz-based. David gave us three options:
- Create a drag over that would reveal something.
- Create a drag and drop that would complete something.
- Create a drag and drop to trigger a response.
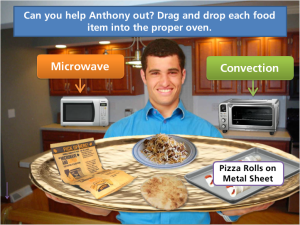
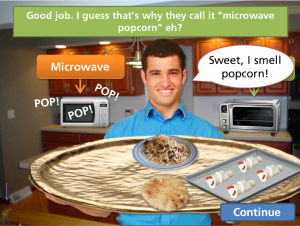
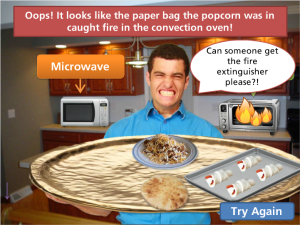
I actually created one in Storyline that was sort of a combination of numbers 2 and 3. Learners would drag and drop food items onto either a microwave or convection oven and get positive or negative feedback as to which was the best option. Then when they got all 4 food items in the right oven, they’d get a final confirmation saying they had successfully finished the job.
It was simple enough getting the positive and negative feedback slides to appear when learners dropped the food items on the 2 ovens. All I had to do there was add a trigger to say when the microwave popcorn gets dropped on the microwave oven, to jump to the positive feedback slide.
And when it gets dropped on the convection oven, to jump to the negative feedback slide. That was easy.
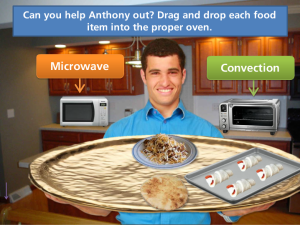
But, because there were 4 food items to drag and drop, I also wanted to take learners back to the drag and drop slide – and when they got back, to have the microwave popcorn disappear after they got it right. That way learners would only see the food items they hadn’t cooked properly yet, so they would know how far along they were in the exercise.
Create Variables
To make those items disappear at the right times, I had to create variables. In this case, the variables were named after the name of the food; pitabread, pizzarolls, chilidip, and popcorn. All 4 variables were true/false with an initial setting of false.
Create Triggers on the Four Positive Feedback Slides
Then on all the positive feedback slides for each of the 4 foods, I created a trigger. The trigger would say for example, that when the timeline starts on the positive feedback slide for the microwave popcorn, that the popcorn variable would change to a value of true. Because the only way the learner would have gotten to that slide would be if they had dropped the microwave popcorn onto the microwave oven, and so the popcorn was cooked properly.
Create “Invisible” States
So we now need the popcorn to disappear. To do it, I went back to the drag and drop slide and added a custom state to the popcorn picture called “Invisible” and just deleted the popcorn picture from that state.
Add Triggers to the Drag and Drop Slide
Then on the slide properties for that slide, I added a trigger. I set up the trigger so that when the timeline starts for that slide AND the value of the popcorn variable is true, that the state of the popcorn picture should change to the “Invisible” state.
I then set up the same combination of triggers and states to the pita bread, the chili dip, and the pizza roll pictures.
So to summarize this: I…
- Created the 4 variables with an initial value of false
- Added triggers to the 4 positive feedback slides to change the values of the variables to true once those slides were visited
- Created “Invisible” states for the 4 pictures of the foods on the drag and drop slide, and
- Created triggers on the drag and drop slide that said when the values of the variables change to true, to change the state of the food pictures to “Invisible”.
One Final Slide
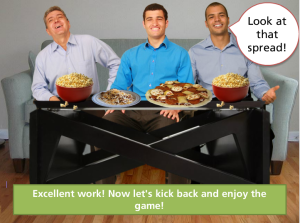
And finally, after the learner got all 4 foods into the right ovens, I set up one more trigger to take them to a final slide showing the guys on the couch with all their munchies watching the Super Bowl – all smiles. Since I’d already created the triggers and variables for the 4 foods, I just added one more trigger to the drag and drop slide saying that when all 4 variables changed to true, to jump to this final slide.
To run the complete exercise for yourself, click here. I know this process was a bit complicated, so feel free to write me if you have any questions or comments.

VERY creative – and quite complex! Tasty and well done. 🙂
Thanks Jackie! It was a fun challenge. David Anderson posts these weekly challenges every Friday for anyone who’s interested. It’s a great way to get new ideas and develop new skills.
THANK YOU for the detailed blog/explanation. The only way to learn how to do this is to practice – but I need someone to give me some guidance to get started. About to sit down and try my own version. Again, thanks!
Thanks Laurie, You’re exactly right, each situation is different. Let me know if you need any help making these elements work the way you want them to.