Ah, my Disney obsession continues. This week’s e-learning challenge was to create an interaction using Storyline’s Lightbox feature. Designers like to use lightboxes when they want learners to be able to look at an outside reference without leaving the slide they’re on. The reference might be talking about how to use the navigation features on the course or perhaps to define key terms used throughout the course. Lightboxes are great because they can be accessed from anywhere in the course and don’t have to be included in the Menu.
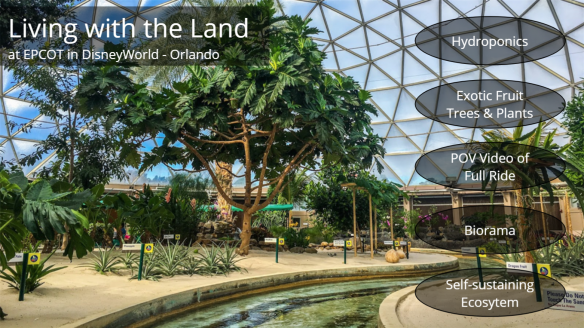
Living with the Land
Being a lover of exotic fruit trees and gardening, I have always enjoyed EPCOT’s Living with the Land ride at Disney Orlando. LWTL takes you on a boat ride starting you off in a life-size diorama (or what I’d call biorama) taking you through various climatic regions from rainforests to deserts to prairies.

Geodesic Dome
After that short ecological history, the boat emerges from the dark diorama into the bright sunlight of its dome-enclosed orchard & garden area. Here you can see a multitude of exotic plantlife: vanilla, dragon fruit, Carolina reaper (one of the hottest peppers in the world), Buddha’s hand, jack fruit, and bananas growing all around you.

You’ll also see experiments in hydroponic and self-sustaining ecosystems. After you exit the ride, you will find a little booth selling starter plants created in their labs. I bought a couple dragon fruit plants which are thriving to this day (although I have to keep them in pots so I can wheel them into our garage when temps get too low. You can also arrange a behind-the-scenes tour of the LWTL gardens and lab to learn more. It’s actually quite inexpensive and we learned a lot.

The Build
I didn’t do anything fancy here, just concentrated on getting some beautiful images and embedded one video from YouTube. These were all put onto separate slides and then I added triggers to the oval-shaped navigation saying to open those slides as lightboxes when the user clicks on them. Finally, in case you were wondering, I used a piece of original music I wrote for the introduction slide that seemed to fit the mood. Check it out here and let me know what you think.