Taking a Breather – Editing Text to Speech

I am a huge advocate of using professional narrators for my courses. Because everyone thinks they can do narration, the field is swamped and very competitive, so you can get some very talented narrators at very reasonable rates. But despite my best efforts to convince them, some clients just don’t want to spend the money.

Tibet4

Now that Articulate has added computer-generated text-to-speech narration, a lot of clients have gone that route. The problem is, the speakers often come off as soulless. Part of the reason for this is that the text-to-speech narrators, unlike us human beings, don’t have to BREATHE! This can make listening to text-to-speech narrators stressful and exhausting. It’s very hard to keep up with the information you’re hearing when the speaker rarely pauses even for a second.

The Magical Comma
I figured out a great and simple way around this problem – add a few commas! When I add text-to-speech, I will import the text from the Notes section (or copy and paste from somewhere else) and inside the text-to-speech entry field, I will read the narration to myself, noticing anyplace where I’m naturally pausing, and add commas in all of those places.

I like to add the extra commas in the text-to-speech box instead of earlier on in the Notes section, because oftentimes I want the text-to-speech voice to pause even a little bit more often than normal punctuation would require. So in this version you can ignore the regular grammatical rules on when to use commas, and just apply them as you see fit to get the narrator’s pacing just the way you think it should be.

Check out this little before-and-after sample, where you can hear what a different a few extra commas can make towards making your lessons more listenable and enjoyable.

Does Music Belong in eLearning?

I’ve never met anyone who said they hated music. Everyone at least likes music, but does it have a proper place in eLearning and if so, where and when should you use it? Certainly there are as many opinions on this topic as there are style preferences in what different people like to listen to. Since this is MY blog, I’ll tell you what I think and you can tell me what you think in the comments below.

MusicianBanjo.png

Because eLearning development tools like Articulate Storyline use separate slides or screens to place your content into, it doesn’t allow you to have uninterrupted background music playing throughout your module. This has never been a problem for me, as I don’t think music should run through the whole thing.

Introduction and Conclusion 

I like to include background music at the beginning and ending of each lesson. At the beginning, it sets the mood for the learner and when it returns at the conclusion, it indicates a sense of accomplishment and that things are wrapping up.

BackgroundMusicScenario

Scenarios and Quizzes

Most of the lessons I create have quizzes, and I like to include a little background music while the narrator explains how to take the quiz, what the passing score is, etc. Sometimes a client will also request a few branching scenarios where learners can practice what they’ve learned in a real-life situation. I’ll often use background music as the scenario is being introduced and again on the feedback slides to indicate if they made the right choices.

During Videos

Occasionally, a client will give me a video where there are bits of narration interspersed with periods of silence. I like to add a little background music if for no other reason than to tell the learner that the video is still running and to keep paying attention.

Watch the Volume!

Be careful not to overwhelm or distract the learner by having the volume on the background music too loud. You want the learner to be able to easily hear what the narrator is saying. As a rule of thumb, I tend to reduce the volume on the background music by 80%.

Before I finish, being the music geek that I am, did anyone catch what other music-related title I’m eluding to in the name of this post?

Am I in Sync?: Using Video in E-learning

One of my clients provides fuel and services to the exciting aeronautics industry. They LOVE video and use it extensively in their training courses. In designing a number of courses for them, I had the opportunity to do a lot of video editing. As much as I enjoy working with video, I always want it to support and not detract from the message being conveyed in each scene.

This week’s Articulate e-learning challenge is all about how to sync video up to your content. So in this article, I will share three different ways to do just that!

Back and Forth

In this first example, I had a picture and text layout that I really liked. So, I brought out each bullet with the picture and then faded in the video to support the more detailed explanation of each bullet, going back and forth between the still shot and the video.

No Bullets, Just Video

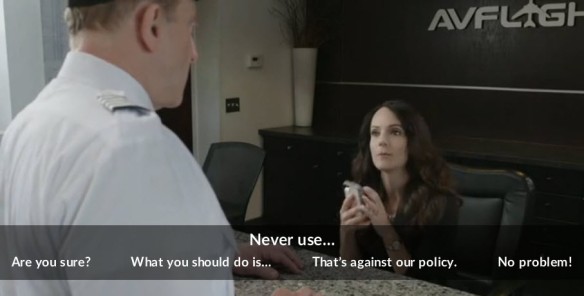
For this one, I didn’t use any bullets, but just edited the video so it would be in sync to the audio content. So when she’s talking about smiling or shaking hands, that’s what you see on the screen. I also edited the video so that the actual sound from the video comes in for just a couple seconds so you can hear the CSR saying “Hello, Mr. Smith…”

I used Pinnacle Studio video editing software which allows you to have video on separate tracks, just like in a music recording studio soundboard. I clipped out that little bit of video with the CSR greeting the customer and put it on a separate track from the rest of the video which was on a muted track. Then, for the voiceover audio track, I added a couple seconds of silence, so the narrator would pause while the CSR was talking. It’s a neat effect, and it also gets the learner’s attention!

You can add silence to any track either in your video editing software or after importing it into Articulate Storyline (which is my favorite e-learning design and development tool).

Bullets on Top of Video

In this final example, I added a semi-transparent rectangle on top of the video and animated in the bullets in sync to the voiceover. This is my most common approach.

Whatever media you are using, always strive to make it support the content. Yes, using advanced animations and creative visual effects CAN effectively keep the learner engaged in the course, but don’t get too carried away and end up distracting the learner. Let me know what you think. Do you have any other ideas or approaches to using video you’d like to share?

This Spelling Bee is for the Birds

In this weeks e-learning challenge, we designers were asked to create a spelling bee interaction as the 2014 National Spelling Bee kicks off. I thought that was a great idea as it was something I’d never thought of doing before. I decided to create one based on physics terminology and have it presented by a parrot.

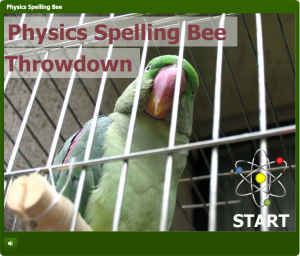
Physics Spelling Bee Intro

Click to play the Physics Spelling Bee

How the hxll did I come up with that?
Well, I had this beautiful image of a parrot flying over a rainforest I had used previously to create an interactive portfolio of my work. I called it “E-Learning that Soars” and I thought maybe I could do something with that. On the other hand, I’m a huge fan of this science program hosted by Morgan Freeman called “Through the Wormhole” where they talk about all sorts of fascinating topics like parallel universes, time travel, etc.

So to combine these two disparate elements of the parrot and physics, I created a story that goes like this: An up-and-coming physicist named Laurie Worthenhiemer has a pet parrot and because Laurie’s always talking about physics at home, Polly (the parrot) has picked up on a lot of the terminology. Polly has a lot of spare time on her hands, so she creates this spelling bee to challenge and entertain her house guests.

Build it and they will come…
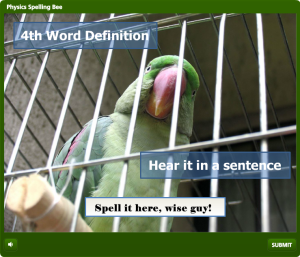
Next, I picked four physics terms for players to spell. As is the case in most spelling bees, you’ll hear the term, then you can ask for a definition and hear it used in a sentence. I reached into my “inner-bird” and recorded all the voices using Cubase SX software and a nice Audio Technica microphone. I set up triggers in Articulate Storyline to play the different audio files when the user clicks for the definitions and the sentences.

Definitions and sentence options

Definitions and sentence options

This might sound obvious, but I also made sure that the notes button on Storyline’s player was not checked, as the transcript I was reading from would have revealed the words and thus given away their correct spelling.

The spelling part
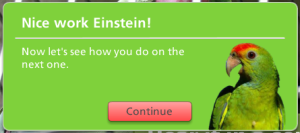
I used Storyline’s built-in quiz question with a text entry field for players to type into. I took advantage of the correct and incorrect feedback layers to put in a few witty comments from Polly based on the words the players were attempting to define. I like to customize the colors and feedback on these to fit the situation rather then just going with the generic “correct, you chose the right answer” and “incorrect, you did not choose the right answer” phrases. I also put in a little picture of Polly speaking to the players to personalize it more.

Feedback layer for right answer

Feedback layer for right answer

Keeping score
I used Storyline’s built-in quiz results slide to keep score. Again, I customized it quite a bit eliminating the “you passed” and “you did not pass” layers. Being this was just a game and not really a quiz, I just wanted to give the players a score. I also removed the “percentage right” total and just showed the points.

The final tally

The final tally

If I wanted to, I could have used the built-in pass/fail layers of the quiz results slide to show Polly making a snide comment about a lower score, and another layer with a comment responding to a higher score. Although I didn’t do that here, it’s something you might consider in building your game. So, there you have it, a spelling bee game created in Storyline presented by a parrot all about physics. Enjoy!

E-Learning Feud

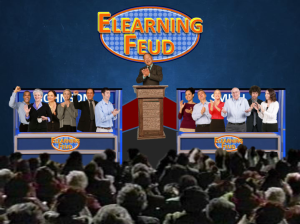
This week’s e-learning challenge from David Anderson was to present a top 10 list. I decided to present the top 10 things you can do in Articulate Storyline in the context of a Family Feud-type game setting. Besides creating the actual module in Storyline, I used a combination of Macromedia Fireworks and Microsoft PowerPoint to edit the graphics. And I recorded original music for the theme song and all the character voices in Cubase SX.

click here to play e-learning feud game

click here to play e-learning feud game

Graphic Editing in PowerPoint and Fireworks
The game show logo was created using PowerPoint’s Word Art for the chunky font. I actually copied the logo making one version with an orange fill and a second one in yellow, then imported them into Fireworks where all the other shapes and fills were created and layered. I used an existing Family Feud logo as inspiration to create the layered look.

e-learning feud logo

e-learning feud logo

One graphic editing tool I love in PowerPoint is the “remove background”. Oftentimes I need to crop an image, but don’t want to just crop it into a rectangular shape. I had this picture of an audience that I needed to crop around the heads instead of a straight line, and the “remove background” feature allows you to do this easily. Then you can just right click on your cropped version and save it as an image.

Audio Recording and Editing
With very affordable digital editing software, these days all you need is a simple interface to go from a ¼ inch cord into a USB you can plug into your computer, a couple good mics, and you can make professional recordings easily at home. I’d like to thank Jackie Van Nice, an excellent voiceover talent and e-learning designer, for doing all the female voices. I did all the male voices and played all the musical instruments.

Audio editing in Cubase

Audio editing in Cubase

Cubase is a great tool because you can do very precise edits, remove all the surrounding background noise, apply compression, do the most subtle of crossfades, and a add host of other effects to your recording.

Storyline Variables and Triggers
To switch from the slide with the Johnson family to the Smith family, I created True/False variables named after each character with an initial setting of False. Then I created a trigger on the last slide for each character, changing each variable to True once the timeline for the last slide started.

Johnson family slide

Johnson family slide

Basically, you’re telling Storyline when the last slide for a particular character has been visited. Then I created another trigger on the Johnson family slide that tells it to automatically go to the Smith family once all the Johnson family members have been visited.

Then, after all the Smith family members have been visited, I wanted Storyline to go to the final slide for the game. So I did the same thing I did on the Johnson family slide; except I told the Smith family slide to advance to the final slide once all the characters  (for both the Johnson and Smith families) have been visited.

Resources
If you want to get the most out of Storyline, I strongly suggest taking Daniel Brigham’s Advanced Storyline course at Lynda.com for step by step instructions on variables, triggers, and a host of other tools. Also, the forums at Articulate’s E-Learning Heroes site are very helpful.