Creating Video from Pictures

One great way to add visual interest and movement on the screen is to create videos from pictures. I like to use the panning technique in Pinnacle Studio, but it’s also easy to create such effects in most video editing programs, and you can even do it to a certain degree in Articulate Storyline.
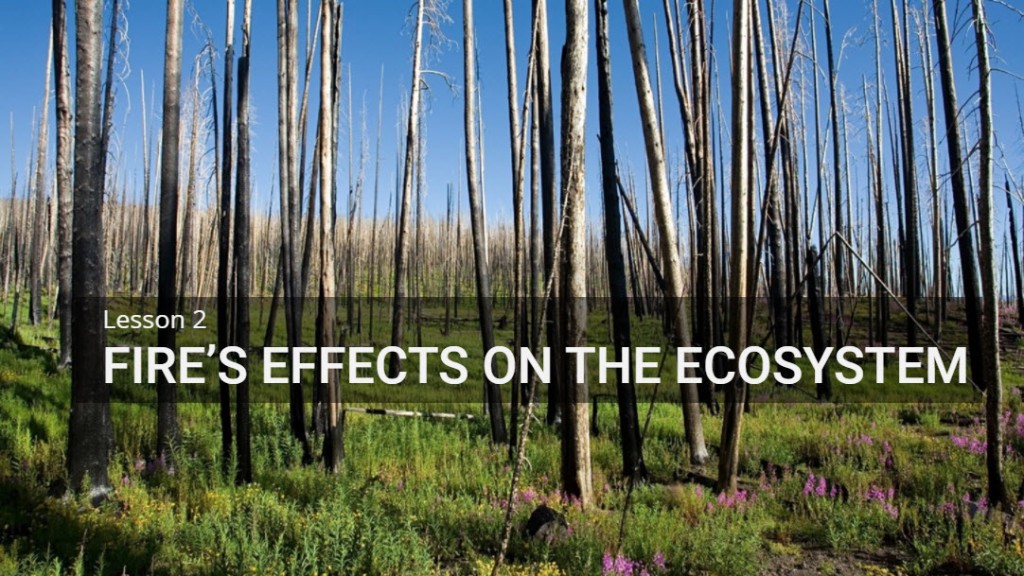
Click to view Lesson

Use High-Resolution Pictures

To get the panning effect to work, you’ll need high-resolution pictures. This is because you need to zoom in on part of the picture to have somewhere to pan to. If the pictures you’re using are low-res, when you zoom in a little, you’ll often find the pictures are too blurry or pixelated to look good. Oftentimes, I do not just pan to the left or right, but I’ll also start zoomed in a bit and slowly zoom out. The main objective here is to give the imagery a sense of movement, even though you’re just using still pictures.

Advantages of Panning and Zooming

Let’s say you have 30 seconds of narration on a given screen. By panning/zooming, you can take just one picture and get more mileage out of it. This is because the panning/zooming is creating movement on the screen. And if you do it right, by panning and zooming, you are slowly revealing other people, animals or objects on the screen which were not visible from the beginning.

It’s pretty amazing how cinematic you can make your lessons appear with some high-quality pictures and one of the most basic and simple video editing techniques. Check this sample from the Fire in Alaska series out and let me know what you think in the comments. Feel free to ask any questions as well.

Creating an Atmosphere

Like many of you, I work from the home creating eLearning lessons. For the last few years, I’ve been playing these background music loops from YouTube to create a nice atmosphere. I prefer instrumental music as otherwise I tend to get distracted with the lyrics. Being an avid Disney fan, I have found BGM loops from different parts of the parks, like the Tree of Life, Pandora, or Nomad Lounge BGM from Animal Kingdom.

Tree of Life at Disney’s Animal Kingdom

I love the mood these music loops put me in, this kind of exotic, magical world. A few of my other favorites are the music from Wilderness Lodge for that western Americana classical style, Animal Kingdom lodge for percussive, marimba & kalimba-based African music, The Land Pavilion at Epcot for a kind of sentimental and uplifting type of classical.

I also will put on some Steve Shehan (percussionist), Pat Metheny (jazz fusion guitarist), or Dhafer Youssef (Tunisian lute player) live videos. The right music, with my morning cup of coffee gets me in the perfect mood. I also have a vast CD and LP collection I can draw from. I prefer popping CDs into my 5-CD changer so it can keep going for hours without me having to attend to it.

So, I really would love to know what you like to listen to while you work. Do you have any favorite recording artists or BGM loops? Who/what are they? Leave me a comment!

Hold Your Horses!

All the time I have clients ask me if I can keep the user from clicking the Next button until they’ve clicked all the objects on a slide. Usually it is because they have a list of topics they want the learner to look at, and they want them to look at ALL of them before they advance to the next slide. I use number variables and states to restrict the navigation in this way.

Using Number Variables to Restrict Navigation

The first step is to create a Next button and then set its initial state to Disabled. Then create a number variable and name it something meaningful so you’ll recognize it when you’re setting up your triggers. Next, add a trigger to each object you want the user to click and tell it to add 1 to the number variable upon the user’s click. Now, let’s say you have 8 objects you want the learner to click. Simply add a trigger which says that when the number variable is 8 or greater, change the state of the Next button to normal. And that’s it!

This post was inspired by this week’s Articulate challenge to show how you use number variables, thanks David Anderson for the idea. Check this interaction out and let me know what you think.

Celebrating Froome and Sagan

I love watching the Tour de France, the mountains and other scenery is so beautiful and the competition is intense and exciting. This week, David Anderson from Articulate challenged us to create an eLearning interaction based on some aspect of the Tour. I chose to talk about a couple of my favorite cyclists, Chris Froome and Peter Sagan. As of this writing, Sagan was holding the green jersey for a few stages, but lost it a few days back, and Froome was unable to participate due to his ongoing recovery from injuries. Hopefully he’ll make it back by next year.

Two Major Cyclists from the Tour

To give the sense of movement, I used a lot of wipe, fly-in/out, and grow animations. I also like starting with a background picture in full color and have it fade out into a semi-transparent grey-scale picture so you can read the text. I also used the yellow tour color and the colors from the two cyclists jerseys for a gradiated background color. Whenever you put text on top of pictures, you have to look out for things getting too busy or hard to read. Hope you enjoy this simple little interaction.

Test Your Geography Knowledge

How does your knowledge of geography measure up against 8th graders from the 1910s? In this week’s eLearning challenge, David Anderson came across a list of questions from an exam written in 1912. It was Kentucky’s Bullitt County exam for 8th graders covering a wide variety of subjects including arithmetic, geography, grammar, physiology, civil government and history. David asked us to create an updated version of the exam for online learners. I loved the idea, and created mine based on a few of the geography questions.

Take the Geography Quiz

Make Them Laugh
I like to customize my feedback, so you don’t just get the generic “correct” and “incorrect” responses. Since geography can be a bit of a bland topic if not taught properly, I threw in some humor, sound effects and simple illustrations into the feedback layers.

Storyline Assets
For my background picture and illustrations, I dug into Storyline’s built-in and royalty-free images. I usually search in Storyline first for images. Since I’ve already paid for the software, it only makes sense to look there first before going to outside providers. Being the quiz was originally written for 8th graders, I remembered there was a little boy’s voice (named Justin) in Storyline’s text-to-speech voices. Justin’s voice is also one of the less robotic-sounding options. I also thought the sarcastic attitude of some of the feedback would sound particularly funny delivered from this little boy’s voice.

So check it out and let me know what you think. Your feedback is always appreciated and can stimulate some interesting and informative conversations.

Taking a Breather – Editing Text to Speech

I am a huge advocate of using professional narrators for my courses. Because everyone thinks they can do narration, the field is swamped and very competitive, so you can get some very talented narrators at very reasonable rates. But despite my best efforts to convince them, some clients just don’t want to spend the money.

Tibet4

Now that Articulate has added computer-generated text-to-speech narration, a lot of clients have gone that route. The problem is, the speakers often come off as soulless. Part of the reason for this is that the text-to-speech narrators, unlike us human beings, don’t have to BREATHE! This can make listening to text-to-speech narrators stressful and exhausting. It’s very hard to keep up with the information you’re hearing when the speaker rarely pauses even for a second.

The Magical Comma
I figured out a great and simple way around this problem – add a few commas! When I add text-to-speech, I will import the text from the Notes section (or copy and paste from somewhere else) and inside the text-to-speech entry field, I will read the narration to myself, noticing anyplace where I’m naturally pausing, and add commas in all of those places.

I like to add the extra commas in the text-to-speech box instead of earlier on in the Notes section, because oftentimes I want the text-to-speech voice to pause even a little bit more often than normal punctuation would require. So in this version you can ignore the regular grammatical rules on when to use commas, and just apply them as you see fit to get the narrator’s pacing just the way you think it should be.

Check out this little before-and-after sample, where you can hear what a different a few extra commas can make towards making your lessons more listenable and enjoyable.

Rubik’s Blues

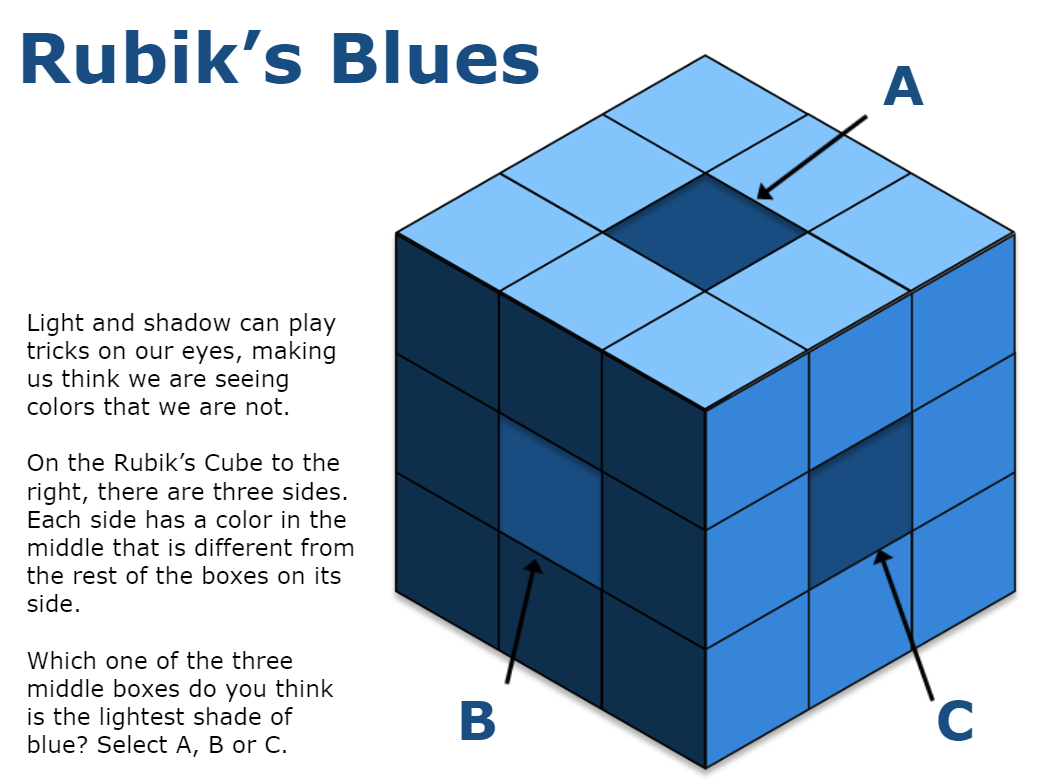
I love watching science programs. I remember one show in particular was all about human perception and how we humans can be fooled by optical illusions. This week’s Articulate eLearning challenge was to create something using Pantone’s 2020 color of the year, “Classic Blue”.

RubiksBluesInteraction

I created this hotspot interaction around a Rubik’s Cube with different shades of the COTY. See if you can guess which of the three boxes is the lightest. It’s not as easy as you think!


Interactive Timeline on Human Rights

I have PBS to thank for my love of US history. It all began with Ken Burns’ series on the Civil War and a two-part American Experience series on FDR. Since then, I’ve also eaten up Presidential and other biographies by many of the commentators on those shows from HW Brands to Doris Kearns Goodwin. I learned one very important thing, that the freedom and equality we enjoy in this country was not a reality the day that Jefferson said all men were created equal, with unalienable rights to life, liberty and the pursuit of happiness. And neither did it happen when Lincoln proclaimed the slaves free during the Civil War.

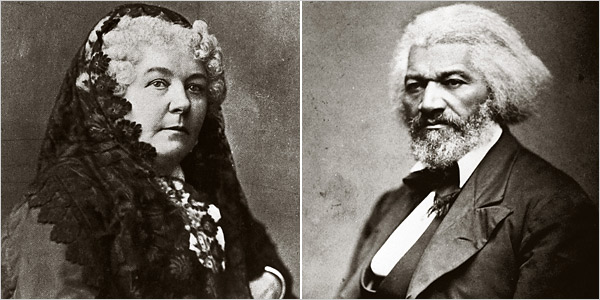
Stanton and Douglass

Elizabeth Cady Stanton and Frederick Douglas – two giants of human rights

The Challenge
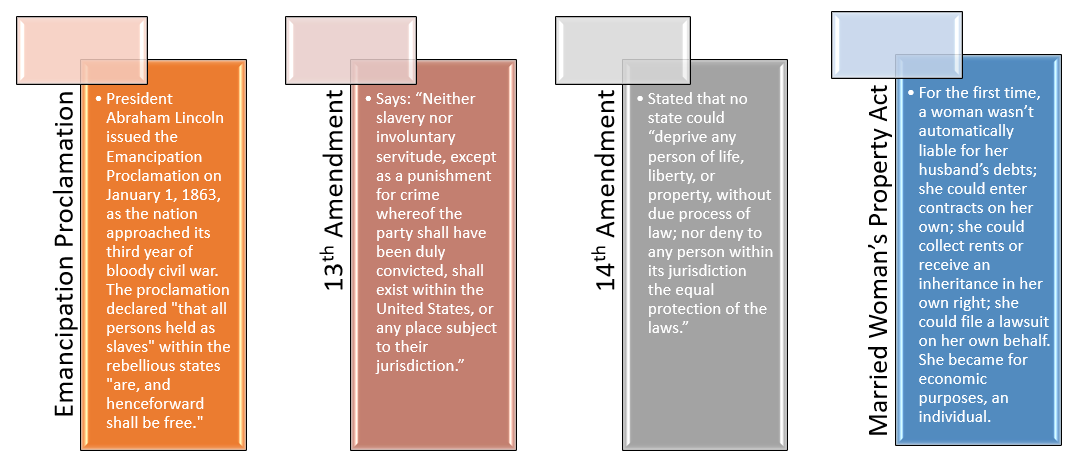
So when David Anderson at Articulate said this week’s challenge was to create an interactive timeline, I knew what mine was going to be about. This timeline is by no means an exhaustive one. I tried to stick with dates when the people of our whole country enjoyed a certain freedom. So when I put 1900 as the year when the Married Women’s Property Act was enacted, it really started in New York in the mid 1800s, but the rest of the states didn’t pass their own versions until later, the last one being in 1900. I had to reduce the timeline entries into fewer, more significant entries to avoid getting bogged down into too many details. Hopefully, this entry will serve to whet your appetite to learn more.

SmartGraphicTimeline

SmartArt Graphic created in PowerPoint

The Build
I used PowerPoint’s SmartArt to create the graphic model. Then I exported pieces of the model into Storyline and assembled them there. I used layers to reveal the detail on what happened each year with a simple click-and-reveal trigger. Originally, I tried to get all the years on one screen, but it proved to be too much content, with the text rendering too small to be readable. So I split it up into separate screens, four years on each page.
Check it out here and let me know what you think!

Fighting Wildfires in Alaska

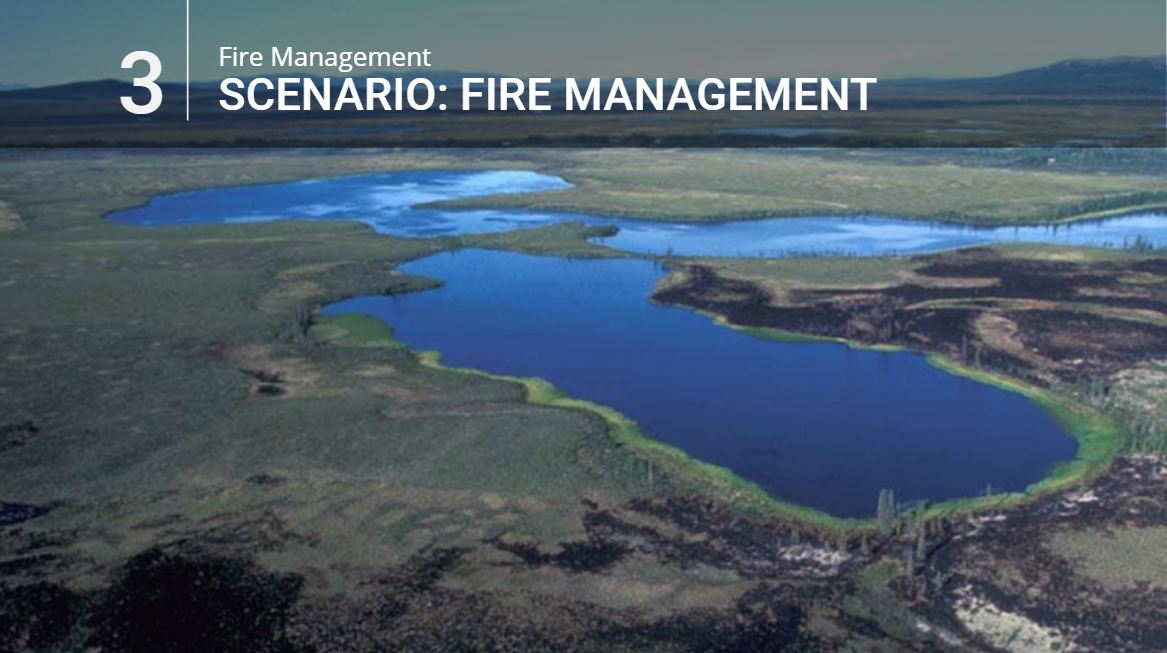
You are a fire manager in Alaska and three wildfires have broken out across the state. You don’t have the resources to fight them all, so you have to prioritize. This interaction is a combination scenario/quiz question incorporating video, music and a sorting interaction.

FireManagementScenario

The Challenge
This week’s eLearning challenge was to create a quiz question with customized feedback. In this scenario, I used the existing feedback layers giving the learner the opportunity to try again if they get it wrong initially. When they do get it right, it takes them to the “correct” feedback layer with a Continue button which takes them to another slide with more detailed feedback in the voiceover and a video giving a bird’s eye view of the landscape and communities we were talking about.

Too Much Information!
There simply was not enough space to incorporate all the feedback the client wanted on the feedback layer itself, so I simply moved that feedback onto a separate slide accessible via the Continue button. For the video, I just took some high resolution still shots of the Alaskan landscape and using the Ken Burns technique, panned across and zoomed in and out of the different shots to add more interest. Check it out here and let me know what you think!

Does Music Belong in eLearning?

I’ve never met anyone who said they hated music. Everyone at least likes music, but does it have a proper place in eLearning and if so, where and when should you use it? Certainly there are as many opinions on this topic as there are style preferences in what different people like to listen to. Since this is MY blog, I’ll tell you what I think and you can tell me what you think in the comments below.

MusicianBanjo.png

Because eLearning development tools like Articulate Storyline use separate slides or screens to place your content into, it doesn’t allow you to have uninterrupted background music playing throughout your module. This has never been a problem for me, as I don’t think music should run through the whole thing.

Introduction and Conclusion 

I like to include background music at the beginning and ending of each lesson. At the beginning, it sets the mood for the learner and when it returns at the conclusion, it indicates a sense of accomplishment and that things are wrapping up.

BackgroundMusicScenario

Scenarios and Quizzes

Most of the lessons I create have quizzes, and I like to include a little background music while the narrator explains how to take the quiz, what the passing score is, etc. Sometimes a client will also request a few branching scenarios where learners can practice what they’ve learned in a real-life situation. I’ll often use background music as the scenario is being introduced and again on the feedback slides to indicate if they made the right choices.

During Videos

Occasionally, a client will give me a video where there are bits of narration interspersed with periods of silence. I like to add a little background music if for no other reason than to tell the learner that the video is still running and to keep paying attention.

Watch the Volume!

Be careful not to overwhelm or distract the learner by having the volume on the background music too loud. You want the learner to be able to easily hear what the narrator is saying. As a rule of thumb, I tend to reduce the volume on the background music by 80%.

Before I finish, being the music geek that I am, did anyone catch what other music-related title I’m eluding to in the name of this post?